Getting an endpoint on Base Sepolia
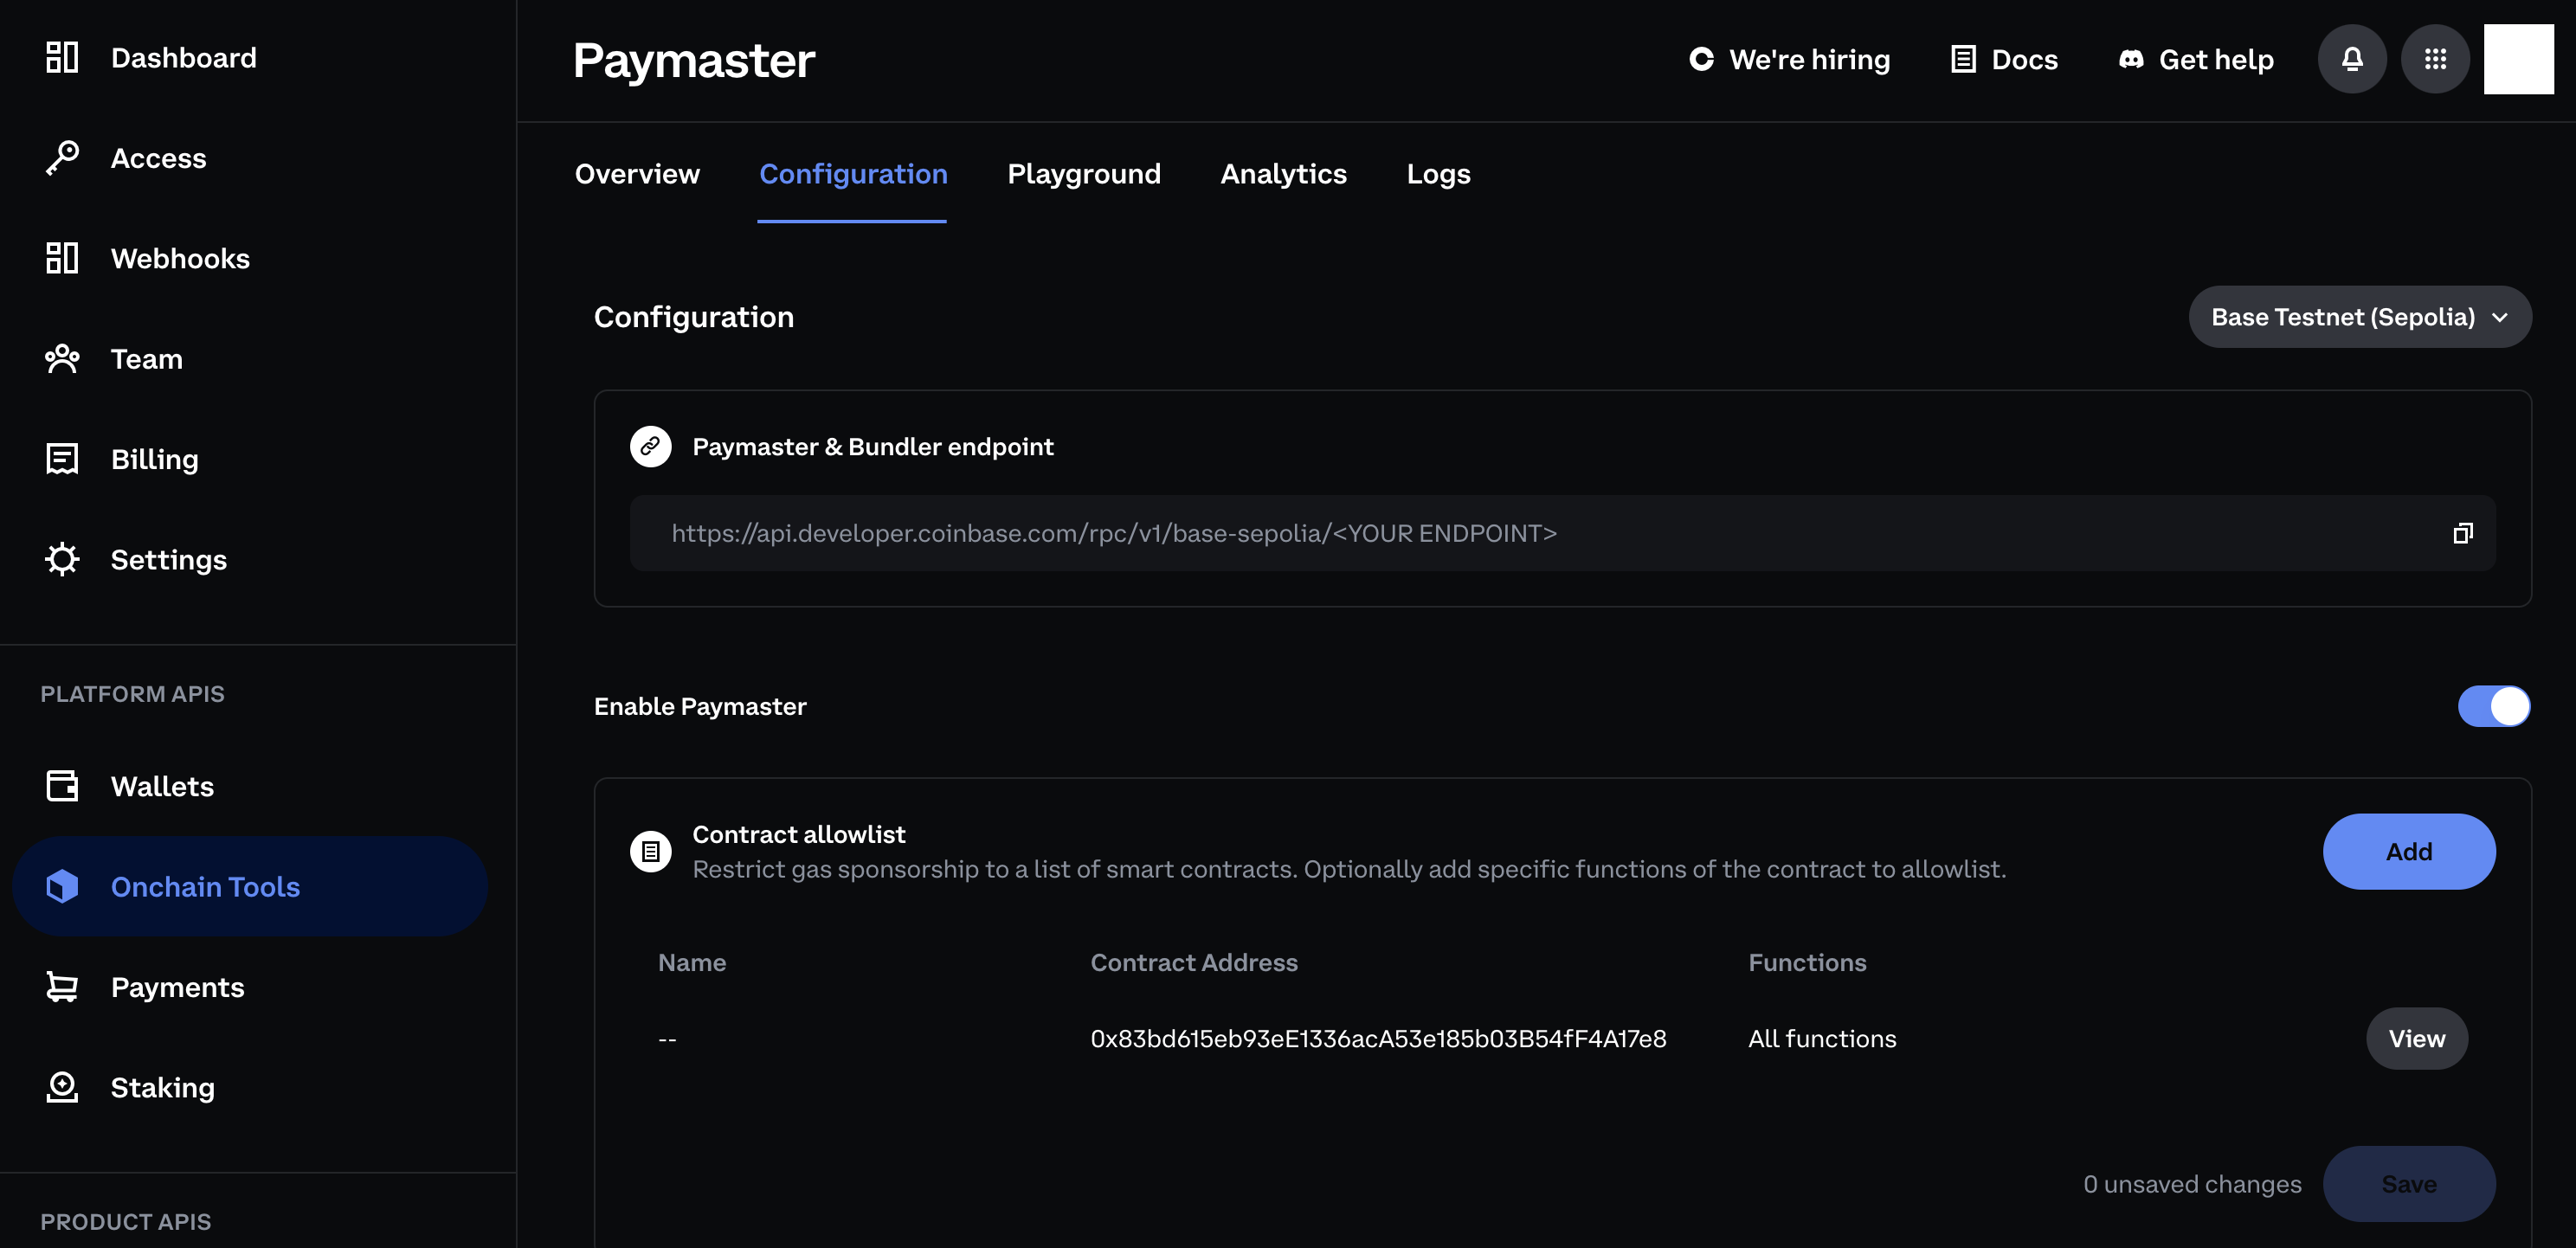
How to Get a Paymaster & Bundler endpoint on Base testnet (Sepolia) from CDP
- Create a new CDP account or sign in to your existing account.
- Navigate to Paymaster.
-
Add the following address to the allowlist under Configuration—this is the address of the contract we are calling:
- Switch to Base testnet (Sepolia) in the top right of the configuration.
- Copy your endpoint to use later.
Expand for images and click to enlarge
Expand for images and click to enlarge

Setting up an app template
Clone the repo.env file
Add your paymaster to the transact button
Navigate to/src/components/OnchainProviders.tsx and modify the OnchainKitProvider’s config object to include the paymaster URL.
/src/components/TransactionWrapper.tsx and modify the Transaction component to use the isSponsored prop.